AKS workload identity is a feature of Azure Kubernetes Service (AKS) that enables you to use Azure Active Directory (AAD) to manage access to Azure resources from within a Kubernetes cluster. In this blog post, we’ll explore how AKS workload identity works and how to use it with an example code.
How does AKS workload identity work?
AKS workload identity works by creating an AAD service principal that is associated with a Kubernetes namespace. This service principal can be used by pods within the namespace to access Azure resources, such as storage accounts, without needing to store secrets or access tokens within the pod configuration.
When a pod needs to access an Azure resource, it sends a request to the Kubernetes API server, which forwards the request to the Azure Identity Binding Controller. The controller then looks up the AAD service principal associated with the namespace and retrieves an access token from AAD on behalf of the pod. This access token is then used to authenticate the pod to the Azure resource.
How to use AKS workload identity
To use AKS workload identity, you need to have an Azure subscription, an AKS cluster, and an AAD tenant. Here are the steps to set up AKS workload identity and use it in your application:
1. Create an AAD application registration
First, you need to create an AAD application registration for your AKS cluster. This application registration will be used to create the service principal that is associated with your Kubernetes namespace.
You can create an application registration by following these steps:
- Go to the Azure portal and navigate to your AAD tenant.
- Click on “App registrations” and then click on “New registration”.
- Give your application a name and select “Accounts in this organizational directory only” for the supported account types.
- Under “Redirect URI (optional)”, select “Web” and enter a dummy URI.
- Click on “Register”.
Make a note of the “Application (client) ID” and “Directory (tenant) ID” for later use.
2. Grant permissions to the AAD application registration
Next, you need to grant permissions to the AAD application registration to access the Azure resources that you want to use in your application.
You can grant permissions by following these steps:
- Go to the Azure portal and navigate to the resource that you want to grant access to.
- Click on “Access control (IAM)” and then click on “Add role assignment”.
- Select the role that you want to assign and then search for the name of your AAD application registration.
- Select your AAD application registration from the list and then click on “Save”.
3. Create a Kubernetes namespace with AKS workload identity enabled
Next, you need to create a Kubernetes namespace with AKS workload identity enabled. This namespace will be associated with the AAD service principal that you created in step 1.
You can create a namespace with AKS workload identity enabled by following these steps:
- Create a Kubernetes namespace with the following annotations:
#yaml codeapiVersion: v1 kind: Namespace metadata: name: <your-namespace-name> annotations: "aadpodidentitybinding": "binding-name"
- Create an AKS identity binding with the following annotations:
#yaml codeapiVersion: aadpodidentity.k8s.io/v1
kind: AzureIdentityBinding
metadata:
  name: binding-name
spec:
  azureIdentity: <your-azure-identity>
  selector: <your-selector>
4. Use AKS workload identity in your application
Finally, you can use AKS workload identity in your application by configuring your application to use the service principal associated with your Kubernetes namespace.
Here’s an example code snippet in C# that demonstrates how to use AKS workload identity with the Azure SDK for .NET:
#csharp codeusing System; using System.Threading.Tasks; using Microsoft.Azure.Storage; using Microsoft.Azure.Storage.Blob; using Microsoft.Azure.Services.AppAuthentication; namespace AKSWorkloadIdentityExample { class Program { static async Task Main(string[] args) { // create a new instance of AzureServiceTokenProvider var tokenProvider = new AzureServiceTokenProvider(); // create a new instance of CloudStorageAccount using the AKS identity endpoint var storageAccount = new CloudStorageAccount(new Microsoft.Azure.Storage.Auth.TokenCredentialAdapter(tokenProvider), "<your-storage-account-name>", endpointSuffix: null, useHttps: true); // create a new instance of CloudBlobClient using the CloudStorageAccount var blobClient = storageAccount.CreateCloudBlobClient(); // use the CloudBlobClient to retrieve the contents of a blob var container = blobClient.GetContainerReference("<your-container-name>"); var blob = container.GetBlockBlobReference("<your-blob-name>"); var contents = await blob.DownloadTextAsync(); Console.WriteLine(contents); } } }
In this example, we create a new instance of AzureServiceTokenProvider, which uses the AKS identity endpoint to retrieve an access token for the AAD service principal associated with the Kubernetes namespace. We then use this token provider to create a new instance of CloudStorageAccount, passing in the name of the storage account we want to access.
Next, we create a new instance of CloudBlobClient using the CloudStorageAccount, and use it to retrieve the contents of a blob. Note that we don’t need to pass any secrets or access tokens to the CloudBlobClient. Instead, the AKS identity endpoint handles authentication on our behalf, making it much easier to manage access to Azure resources from within our Kubernetes cluster.
I hope this example helps you understand how to use AKS workload identity with the Azure SDK for .NET!
Conclusion
AKS workload identity is a powerful feature of AKS that enables you to use AAD to manage access to Azure resources from within your Kubernetes cluster. By using AKS workload identity, you can avoid storing secrets or access tokens within your pod configurations, making it easier to manage security and access control in your application.
In this blog post, we’ve explored how AKS workload identity works and how to use it in your application. We’ve also seen an example code snippet that demonstrates how to use AKS workload identity with the Azure SDK for Go. Hopefully, this has given you a better understanding of how AKS workload identity can be used to simplify access control in your Kubernetes applications.
References
Related Posts
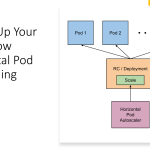 Scaling Up Your Pods: How Horizontal Pod Autoscaling Wins
 Achieving DevOps Harmony: Building and Deploying .NET Applications with AWS Services
 Harnessing AWS CDK for Python: Streamlining Infrastructure as Code
 Mastering AWS EKS Deployment with Terraform: A Comprehensive Guide
 A Comprehensive Guide to Provisioning AWS ECR with Terraform
 Introduction to Site Reliability Engineering (SRE) in Azure: Achieving Higher Reliability with AKS and Essential Tools